
The Introduction
Lots of guys out there want to make a bushcraft knife and have no idea how to go about it. There are hundreds of knife making tutorials on the web and some are pretty good. It turns out there are about 1000 times more opinions about good blades too. It's very confusing sometimes. It's definatley buyer beware in terms of actual knowledge versus assumed knowledge where bush blades are concerned.I have been working on making a decent blade for a little over 3 years (almost 4...
On a side note, if you want to design a blade for the bush it's probably a good idea to have used a bush knife before you do. There is no one right knife here. Knowing what is too big and too small for your purposes will provide a lot more useful design input than some egomaniac, rambling on about his perfectly polished woodlore. It's good to want nice things but nice is relative and function has this beauty all its own.
The Intent
I have put this up because while I was trying to learn about doing this, I ran into about a hundred things I never even considered asking about until one had bitten me and my latest blade was going to be less than perfect again... I want to share those for folks just starting out. If it helps then great. If it's not your thing then feel free to move along. No hard feelings.
I have no desire to rewrite methods in use by time tested and proven blade smiths. This is not a debate. This is how I have learned to do this pretty simple thing with a ton of small details that really make or break things.
So, let's get into it then....
Tools Required
The simple fact is that making tools requires tools. For making a knife with the method I have outlined here you will need at an absolute minimum:- A Hacksaw - Sears, Walmart, Harbour Freight, whatever. Get a good blade though.
- A Good File - Double cut Bastards work well but gouge more. Fine cut takes a good deal more time. A combination of the two works well.
- A Drill press - Craigslist is your friend. This doesn't need to be anything special. I have used a Craftsman 12" press I bought for $30, 5 years ago for every knife I have made. Still workin...
- A Vice - Vices work better than clamps. Buy one from about anywhere as long as it will bolt down and hold pressure.
Tools Nice to Have
These tools are just really helpful. If you can afford or borrow from someone, you'll be pleased I think.- A Belt Sander - I bought a 2 X 42 Sears sander almost 4 years ago and it's still chugging. Others have used these as well and they are well reviewed. If you can swing this expense, it helps.
- A Band Saw - Not required by any means but very handy for grips / scales in making knives.
Design
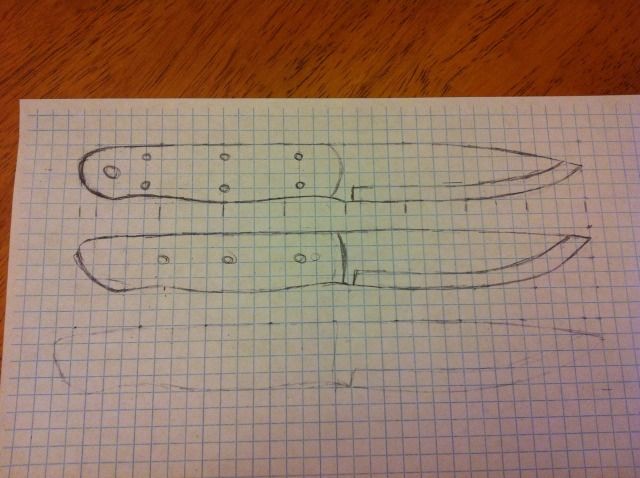
I have, at any given point in time, 2 or 3 graph paper pads floating around my house and they are all filled with pictures of knives. Design is the easiest and nearly the funnest part of blade work.With any luck you have done enough bushcraft / outdoorsie type stuff to know what you want in a knife and what you don't. For the first couple of times you try to draw up a blade, make a list of what should be included and try to get it in. After a while, you'll just know what you like and what will work for you.
Just a thought about searching for designs.... Internet Forums & YouTube are infested with guys who know everything about knives. Pay attention to the knives they are discussing. If the knife is clean (meaning unscratched and perfect....) and shiny, the review is BS for the most part. Find the guy with the ugliest most beat down looking blade you can find and copy what he has. Those knives have worked... Check out what Mors has to say on the subject. He seems to have the experience to back up what he says... ;)
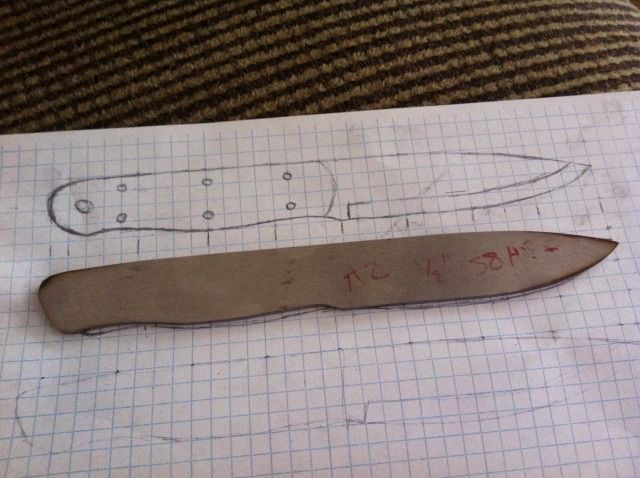
In the end, draw something you are comfortable looking at and is pretty simple in shape. My knife for this exercise is the top one on in this picture.
Make a Copy
Next up, make yourself two copies of your drawing. Put one aside for later and cut the knife drawing out of the other. The goal is to use it as a stencil on your bar stock...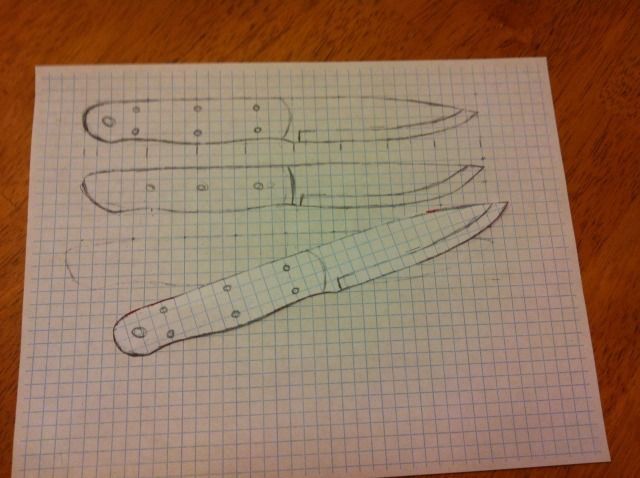
Get Yourself Some Tool Steel
OK. So we have a design and we have a stencil and we're comfortable we like the way it looks so, time to make a decision about the primary material in a knife... the blade. For your selection, you need to make a decision up front about heat treatment. If you want to heat treat at home and quench to harden your blade you should probably choose 1095 or O1. If you are willing to spend the $35 to have a blade heat treated professionally, then pick what you like. Bear in mind D2 and Scandi grinds are rumored to not play well together and for a first Scandi ground blade I would recommend 1/8" or 3/32" stock. Order bar stock wide enough to fit your blade. Unless you like sanding, order precision ground stock.For this exercise I am using A2 tool steel. I have selected a bar that is 1" wide (Same width as my blade) and 1/8" thick.I will be shipping my blade off to have it treated.
So where do you get tool steel? I recommend highly these guys. (Amtek Tool) 4 years, no issues, great people.
Stencil Your Blade onto Your Bar Stock
This part is pretty self explanatory. Use your cut out and sharpie and trace your outline on the bar stock. Keep the stencil and marker handy in case you need to remark. (You will...)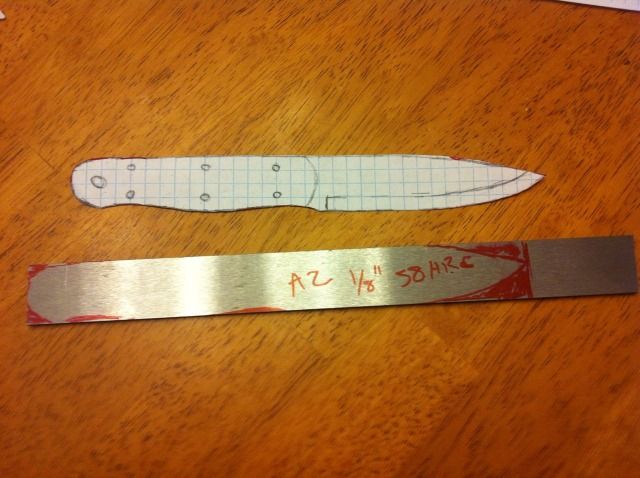
Hacksaw off Big Chunks
Take that hacksaw you bought and put that stencilled bar stock in the vice. Cut it length and then cut off the big red chunks being careful not to get inside the profile outlined on the steel.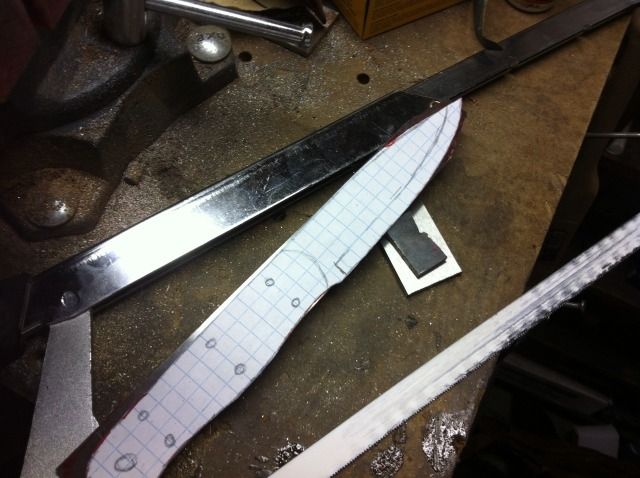
Profile Your Blade
Alrighty then... This part has no pictures but is, in practice, pretty easy. At this point, I use the belt sander and an 80 grit belt and remove all of the red colored steel remaining. What's left is the profile of the blade. There is no way to learn this part but to do it. One thing I did find helpful was to practice shaping wood to knife shapes. It helps give a sense of how the blade has to be positioned in order to get the shape you want on each face. Just be patient, wear a respirator and safety goggles, and watch your fingers. Pinches and sanded fingertips hurt.If you don't have a sander You can do this with a drill press, a hacksaw, a vice, and a file. Drill holes around your outline close together. Use the hacksaw to cut between them until you have your really rough profile done. Then clamp the blade in a vice and use the file to smooth out the burs. I did this once and never again. I am a touch lazy about this...
Test the blade to make sure your hand fits comfortably in the grip you've made. If it needs widened or reshaped, this is the time to do it. From here on it only gets harder to do.
Pins and Holes
The very first thing you have to decide about pins is where you want to put them. Everything else sort of flows from that. In my initial drawing I had six pins and a lanyard tube on this blade. I have decided instead to do two pins, center line and a lanyard tube.Pin placement on a regular shaped blade like the one I am doing is pretty simple and easy to line up. On more fluid shapes it can get tricky. I find it's helpful to lay out a couple of patterns that don't interfere with each other and make a final decision. Here I have a three pin and two pin pattern.
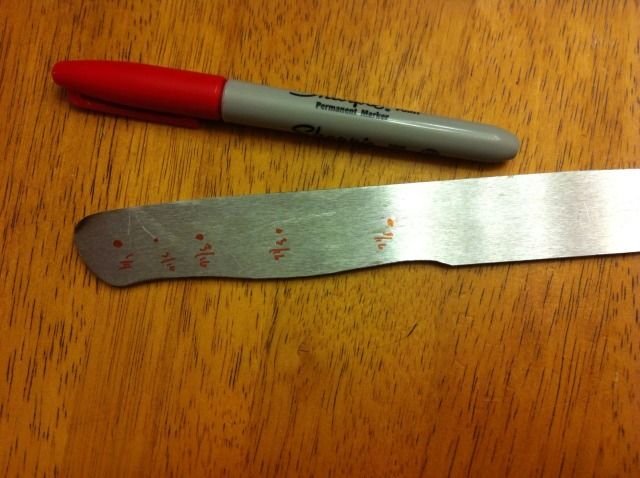
Like I said, I opted for the two pin layout with the lanyard tube.
There are a variety of pins stocks available. For the first time around I recommend Brass that you can get at Sears Hardware for a few bucks for 3 feet. It's tough. It's easy to work. It looks nice polished. Oh yeah, it's cheap too. :) If you decide to go with Mosaic pins because they just look super cool and you gotta have um, make sure the patterns line up between all of the the pins in the handle. Superb boost to knife looks if you can do it.
Drill Baby Drill!
Using a punch and a hammer, place a small detente in the center of each of your marked pin locations. If you get this wrong or it moves or whatever can go wrong, you can turn the blade over and try the other side. Once you have your centers set, it's time to drill.
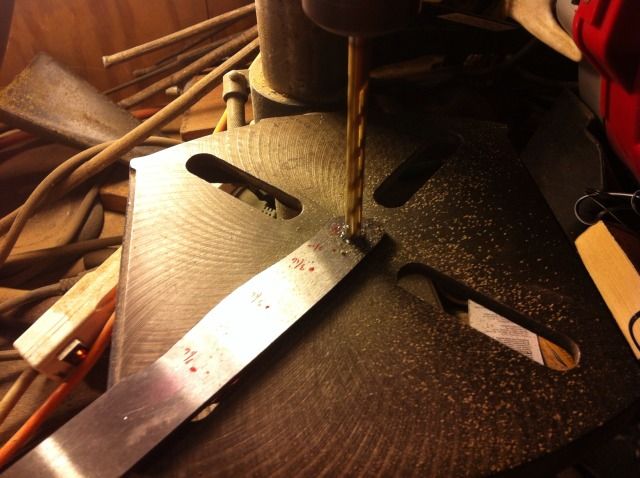
I strongly recommend clamping your blade down while drilling. It will prevent a number of unpleasant outcomes and keep you safe. Set the press on its lowest speed, oil the hole as you are drilling now and then, and be patient. Don't rush it or it will make a mess of things.
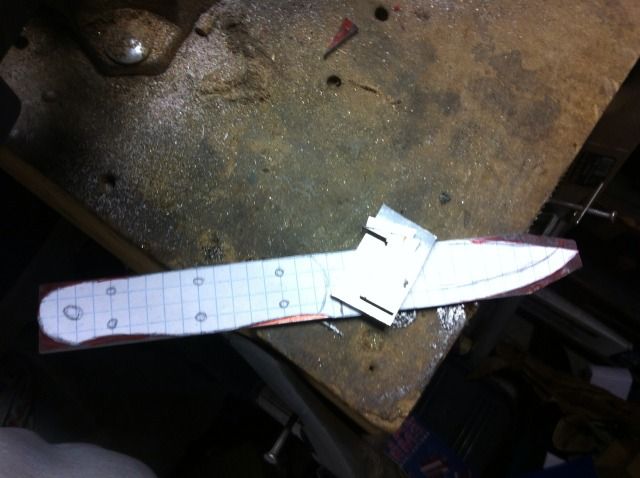
Mine looks like this with the pin holes drilled.
Once the pins are drilled, I add a group of holes in the handle primarily intend add surface area for the epoxy to bond and to drop a small bit of weight out of the handle.

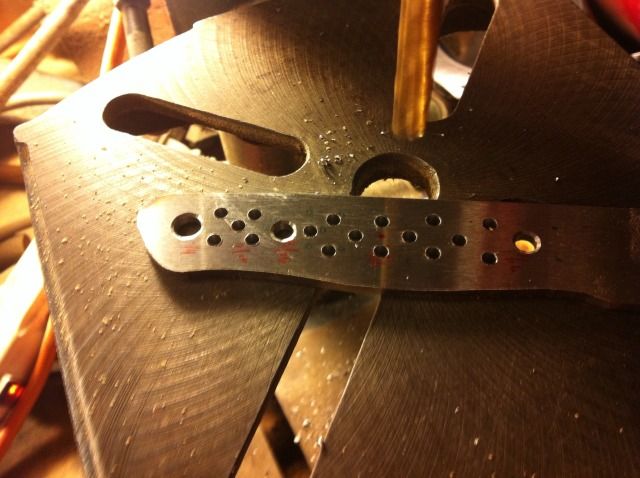
One the flares are done, the last step I take with the grip is to pass it one time over the platen and rough each side where the scales will bind. This aids the epoxy in binding and provides a bit of grip...
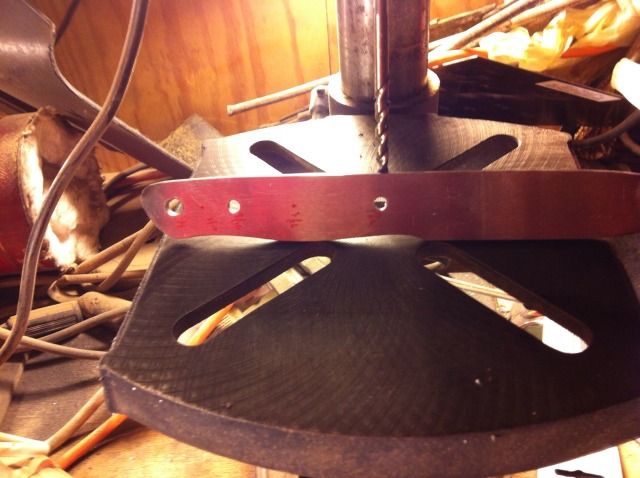
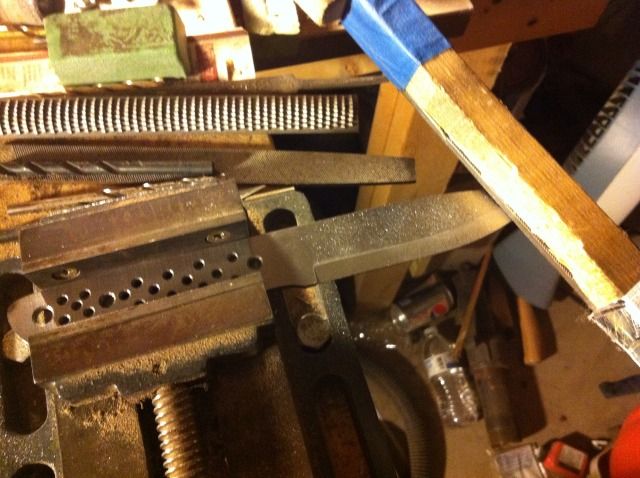
Time to Bevel
I make Scandi ground bush knives. There are few reasons for this which don't really matter here. What's important is that the grind is even on both sides of the blade and that the grind doesn't "drift" into the choil space. To prevent this I made up a grinding guard. It's two bolts and two chunks of bar stock from Lowe's. Line up the strip and drill the holes and it works like a dream. Tighten this up on the blade until you can't move it by hand.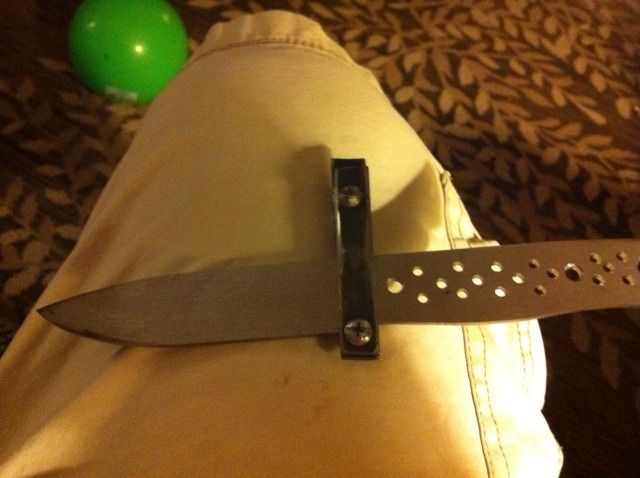
I have a video I did a while ago about how my griding jig sets up and works. Please have a look and feel free to ask questions. Also, britishblades.com has a number of makers and tutorials on how to make a Scandi grinding jig.
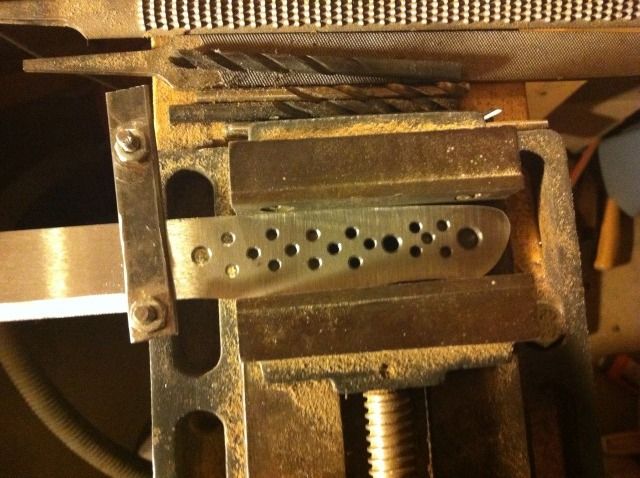
I usually work the blade down to about .030" left on the edge with the file.
Once I get there, I switch to sand paper and a good solid flat surface. The goal is removing all of the gouges the file leaves. It usually takes a sheet of 200 grit and a sheet of 400 grit and things smooth right out... Feel free to press hard through this but make sure you keep the angle or you'll get something a bit different than you started with.

Finishing Up
At this point the remaining work is cosmetic. The blade itself can be sanded to any finish you want to put on it. I usually set mine on a flat surface that is free of any particles that can scratch or in the vice and use 200 grit to remove the grain in the flats and then sand with 400 grit with oil to put a nice satin finish in place. The key is to get the big scratches out. Without that, they get hardened in place. That makes finish sanding a bit more work... I also sand the spine until everything scratched or gouged is removed.Mine looked like this when I packed it up...

Heat Treatment
At this point, your blade needs heat treated. For what it's worth I recommend sending your blade to one of the really good operations out there doing this work for a living. My personal favorite among them is Peters' Heat Treat. Paul Boss, Texas Knife Supply, and others are also available.Good heat treatment is the core of steel working well. This is a key thing and worth the dime to have it done by a pro. Just my take.
The Next Part
I've shipped my blade to Peters' on a Tuesday. It should be back in about 10 days and I'll type up the second part of this (How I do handles, etc.) when it gets back.Part 2 is viewable here...
2 comments:
The way I go about this is similar, but I can save a lot of time and strength by using an angle grinder with a cut off wheel to cut off the big waste and a grinding wheel to get it close before cleaning up the side view with a file. I try to avoid my hack saw when feasible. Great article, thanks for sharing. Good work.
Thanks for the straight forward article there is a lot of unnecessary snake oil and mystery out there.
Post a Comment